Alright, so this was my very first reupholstery project. EVER!
We are currently in the process of building a new home, and with that brings about more room and the need for more furniture. I'm all about trying to save money so I decided thrifting a couple of chairs and finding some cute fabric (on sale) would be my best way to go.
So, I set to the task of finding some used chairs in decent shape that I could fix up. My brother lives about 2 hours north of us and happened to find this beauty.....
in front of a church with a sign on it that said "Free to anyone"
(and that was my first check on the list to save money....free chair! SCORE!)
I then set to work on finding some fabric I liked, and let me tell you, this was the most difficult part of this whole project!! ugh! So many options, but keeping my budget in mind, it made it a little more difficult. I then found a few options and was able to narrow it down. My final decision was made when I figured in the cost per yard compared to how much yardage I would need. How did I figure this, you ask?
* I found this awesome site where she has already figured it up for you. :)
(Kind of cheating I know, but hey, it made it tons easier for me!)
Click HERE to go to her site.
* My next piece of advise is to do LOTS, and LOTS, and LOTS of research on it and just when you think you have read every blog or site about it, READ MORE. Google was my best friend!
* Get all of the supplies together before you start. It will take a lot more time if you are running around trying to find what you need.
* Also, take as many pictures as you can. Have a blank memory card before you start and every time you remove a piece, take a few pictures of it. Before and after pics.
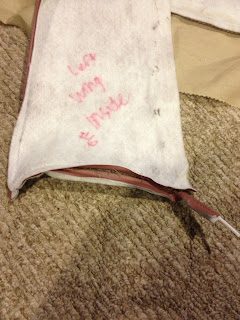
* Be careful while taking your fabric off, because you will use them as your patterns! As you take each piece off, label it with a # for the order you took it off and the location of the chair where it was.
* Last, take your time!!!! It seriously took me about 6 hours to remove the staples, fabric pieces, lable them and get the chair down to its "bones". I then let it set until the next day and then used my fabric pieces as patterns to cut out my new fabric, labeling the new stuff with the location of where they were to go. The next day, was assembly day, which was the funnest part and went together quite quickly. Just take breaks so you dont get so overwhelmed with it!
Alright, now here are some pictures of the process it took for me to get my chair torn apart and put back together....
Get your supplies together. You will need a screwdriver for screws and pulling staples, pliers, a jar to hold the staples you remove (trust me, there are millions), scissors, a marker, a tarp (optional), a heavy duty staple gun and a LOT of staples.
Then, you can get to work!
Most chairs will require you to remove the legs.
Like I said before, if you just label each piece with a # of the order you took it off, when you are reassembling with your new fabric, just go in reverse order and it will go together smoothly!
Usually the bottom felt piece and back will come off first and then you can see how the fabric is layed on to see how it will come off.
Roll out a few yards of fabric and lay out your patterns. You will have to play with them a little to try to get the most pieces in as little as space as possible. The link I gave you above shows I would need about 5 yards of fabric for a chair like this and I actually only used about 4 to 4/12. Buy extra! you can always make throw pillows for your couch or something. It's better than running out!
Some chairs will have cording. Don't get intimidated! You can usually reuse the cording once you've picked all the stitching. Use a narrow presser foot and resew it into your new fabric.
After you have all your patterns traced and cut out, you are ready to start reassembling your chair!
I had so much fun with this part and I had my chair put completely back together within a couple of hours.
Just remember, put each pattern on in reverse of what you took it off. Use a LOT of staples, and keep the fabric pulled tightly.
Now, I will tell you....if you buy a thrifted chair, you will most likely find some "treasures" while tearing it apart. :) I know I did.... luckily there was nothing too gross.
I was able to do this project for under $150. Not too bad if you ask me!
Remember, just have fun with it. You can make it your own and the worst that can happen is a screw up that you will just have to start over.
Let me know if you have any questions.
Addendum...
Like I said, Google was my best friend for my research but here were a few of my favorite sites/blogs where I got my tips:
and of course You Tube
These were just some that helped me, but there are a million more out there!
Good Luck!


No comments:
Post a Comment